IDE and Software Tools Installation Guide | Renesas RA - 2
Published
Hi again! In the previous tutorial I told you about the RA family of Renesas. Now the time has come to do some practical work. We’ll start with the installation of the e2 studio IDE with the Flexible Software Package (FSP) which is needed to work with the RA MCUs.
e2studio IDE is used to program almost all MCUs by Renesas so by default its installer is pure and doesn’t contain any toolchain, so you need to install them separately. Thus there are two ways:
- Install pure IDE and FSP separately;
- Find the installer which will include both e2studio and FSP.
We’ll go with the second option. Actually, I’m not sure if I would have found it by myself if I didn’t look into the RA Family Beginner's Guide. For now it’s available under the following link https://www.renesas.com/products/microcontrollers-microprocessors/ra-cortex-m-mcus/ra-book. I recommend reading it if you want to get more official information about how to start working with the RA MCUs. In my first tutorials I will often refer to it.
In that Guide, I’ve found the link https://github.com/renesas/fsp/releases where I can get the installation file. By the moment of writing this tutorial the file name is setup_fsp_v3_5_0_e2s_v2021-10.exe. When you go there, the actual version of the FSP or e2 studio may differ, so please look at the structure of the filename, not the real version numbers. The size of the file is quite large (1.36 GB).
When you run the file, you will see the following prompt (Fig. 1)
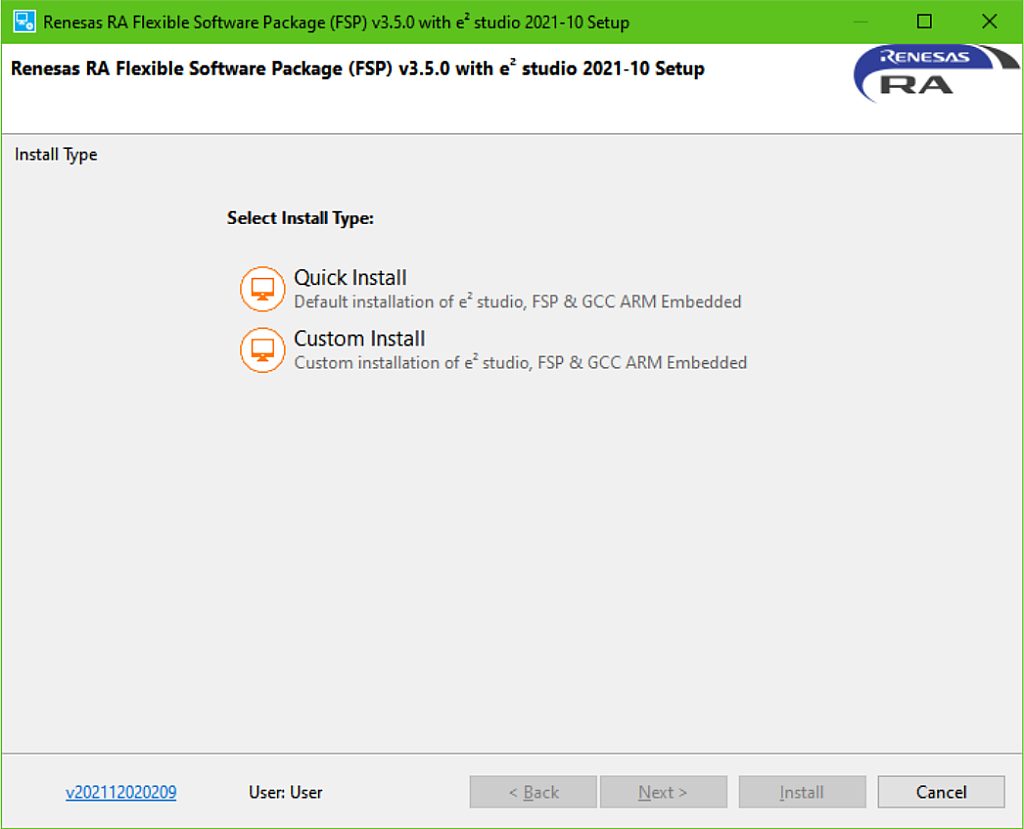
It’s up to you what to choose. The first option will just install the minimal required software, while the second one gives you more customization freedom. I’ll choose the last option and click “Next”. The following screen will appear (Fig. 2)
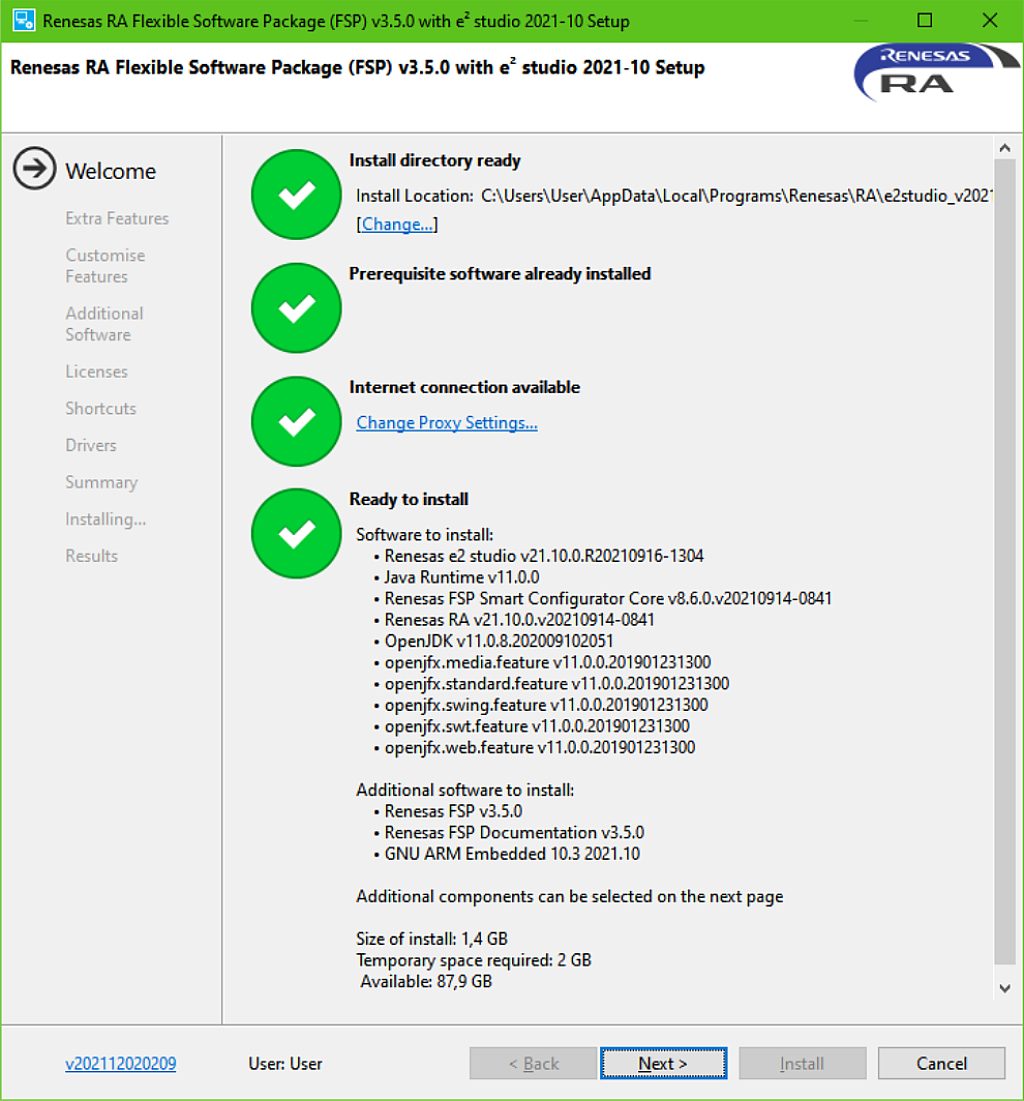
We can change the installation directory here, which I will do. I prefer to have my programs in the “Program files” directory instead of somewhere else, where I can’t find them later. But it turns out that for some reason the path can’t contain spaces (Eclipse, really??? It’s 2022 already), so I’ll choose the “C:\Renesas\RA\e2studio_v2021-10_fsp_v3.5.0” location. Then click “Next” (Fig. 3).
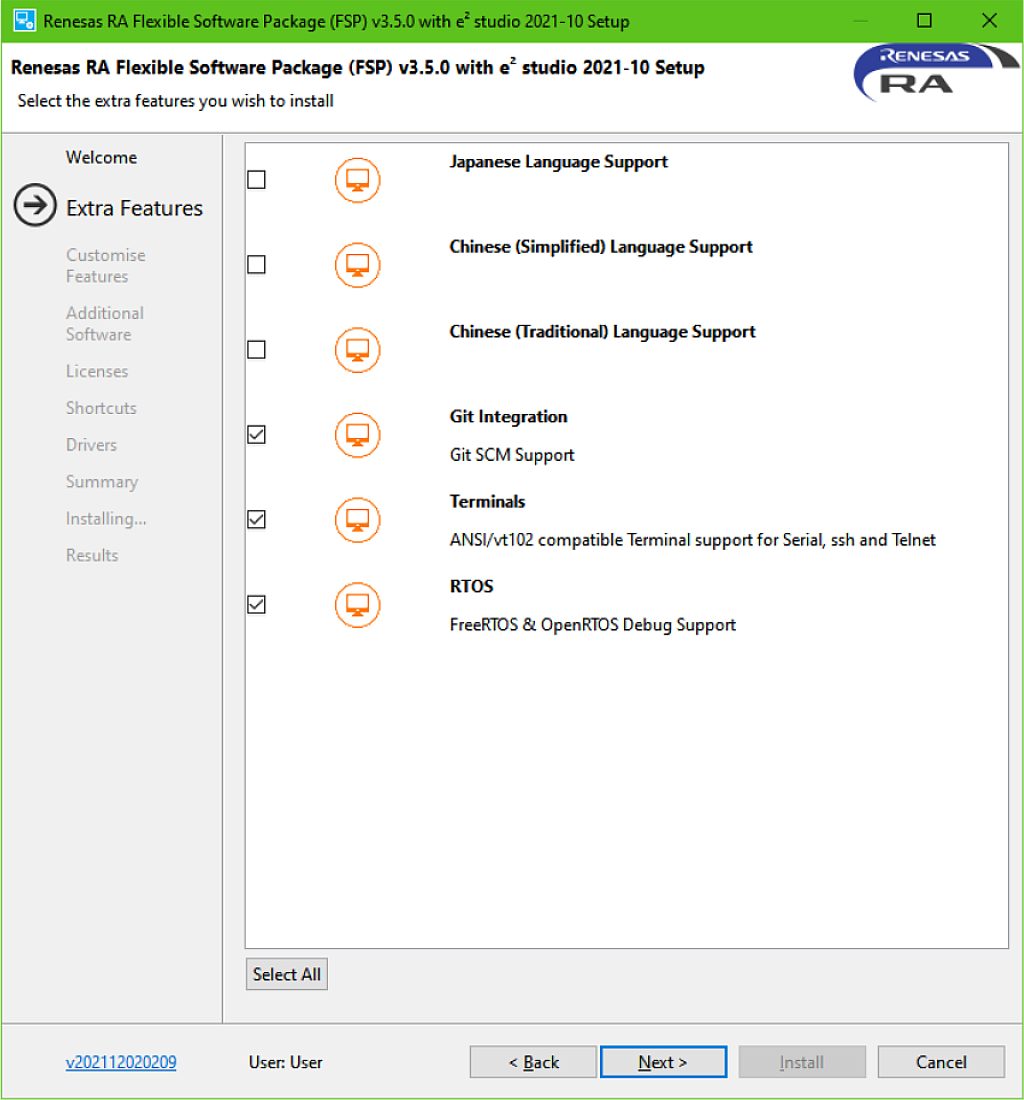
I don’t need the Japanese and Chinese support, so I didn’t select these options, but I selected the other ones, just in case, as they sound interesting. Then click “Next” (Fig. 4)
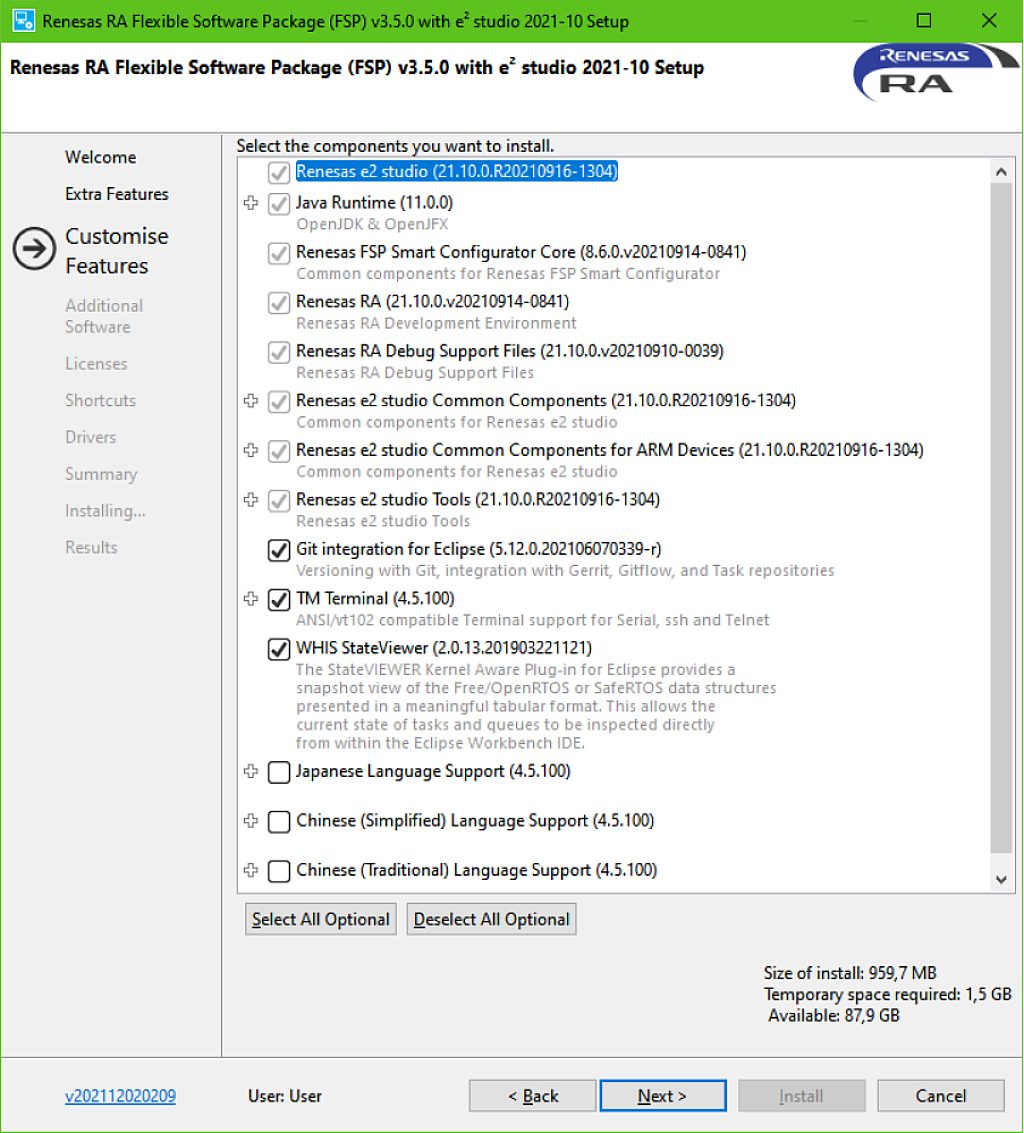
This step seems to do the same as the previous but with more customization options. I don’t see any reason for doing this twice but we have what we have. Maybe it gives us a last chance to reconsider and change the selection. Let’s just click “Next” without changing anything (Fig. 5)

Here you can see two tabs: Renesas RA, where all parts need to be selected, and Renesas QE, where you can select the additional optional software. I’ve selected all of them. Then we click “Next” again (Fig. 6).
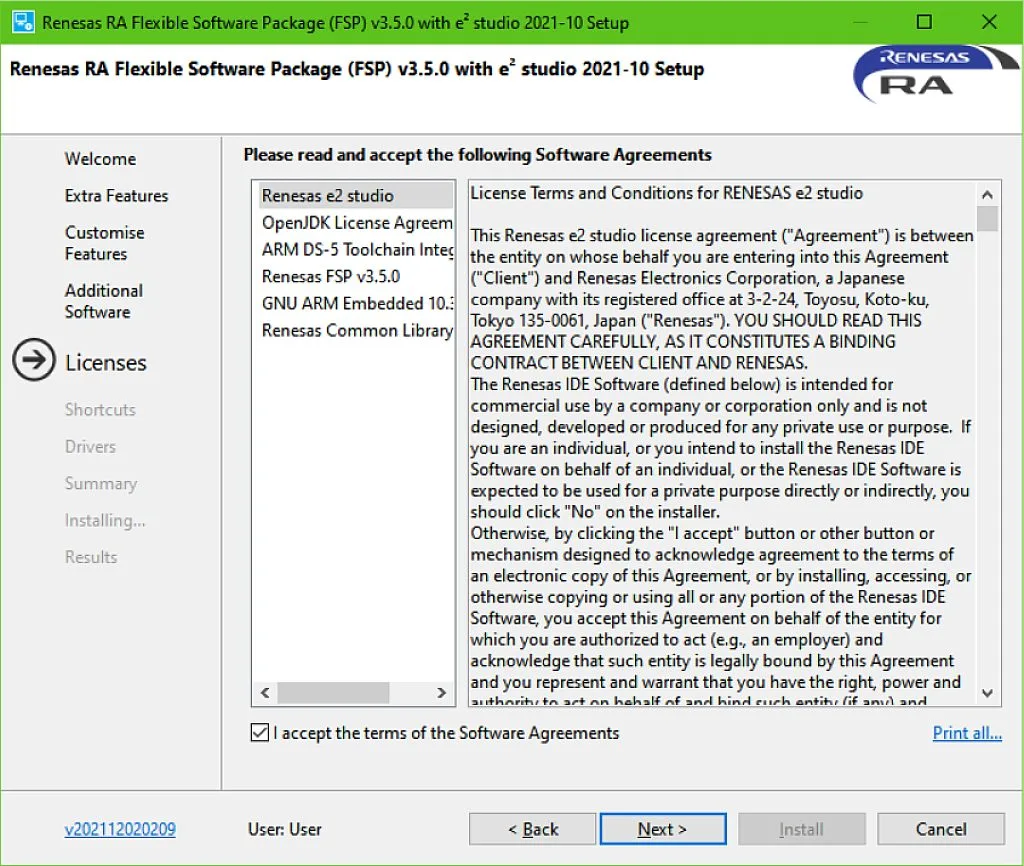
Here we need to read carefully and accept the terms of the software agreements. Then the “Next” button becomes active, so we can click it (Fig. 7).
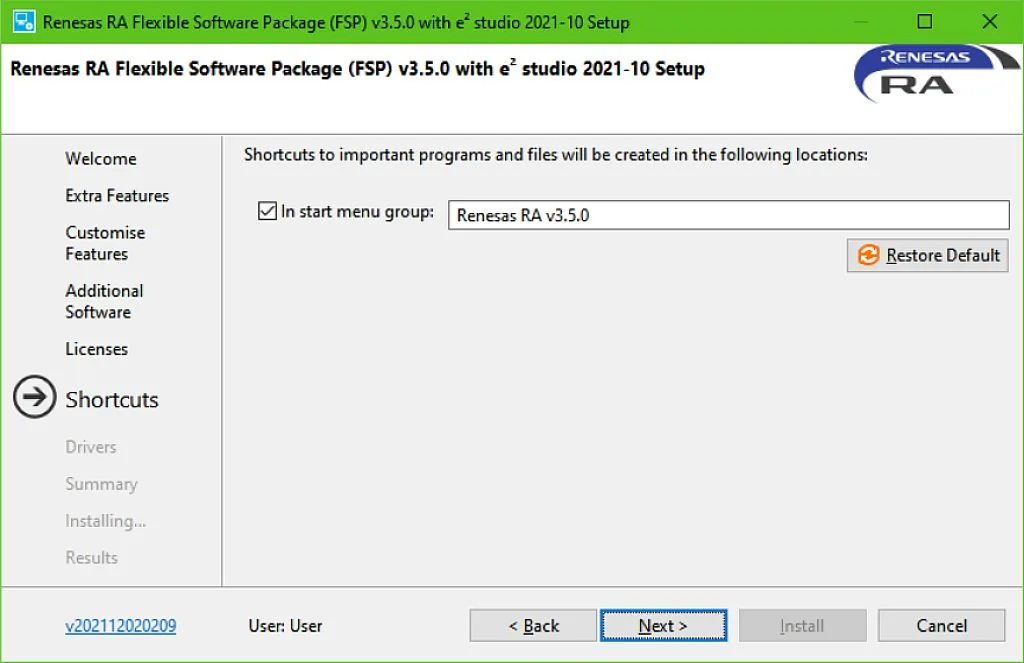
Shortcuts… Well, I’ll leave it to you. Then click “Next” (Fig. 8)
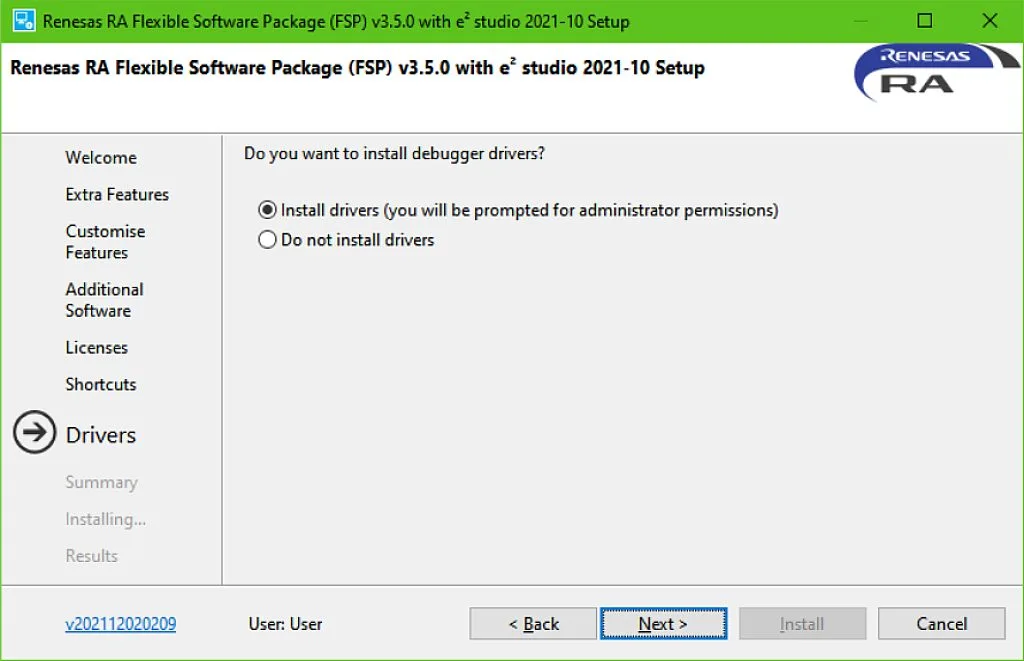
I think it’s better to install the drivers. Even if you already have the installed drivers, it won’t hurt to update them. Then click “Next” (Fig. 9).
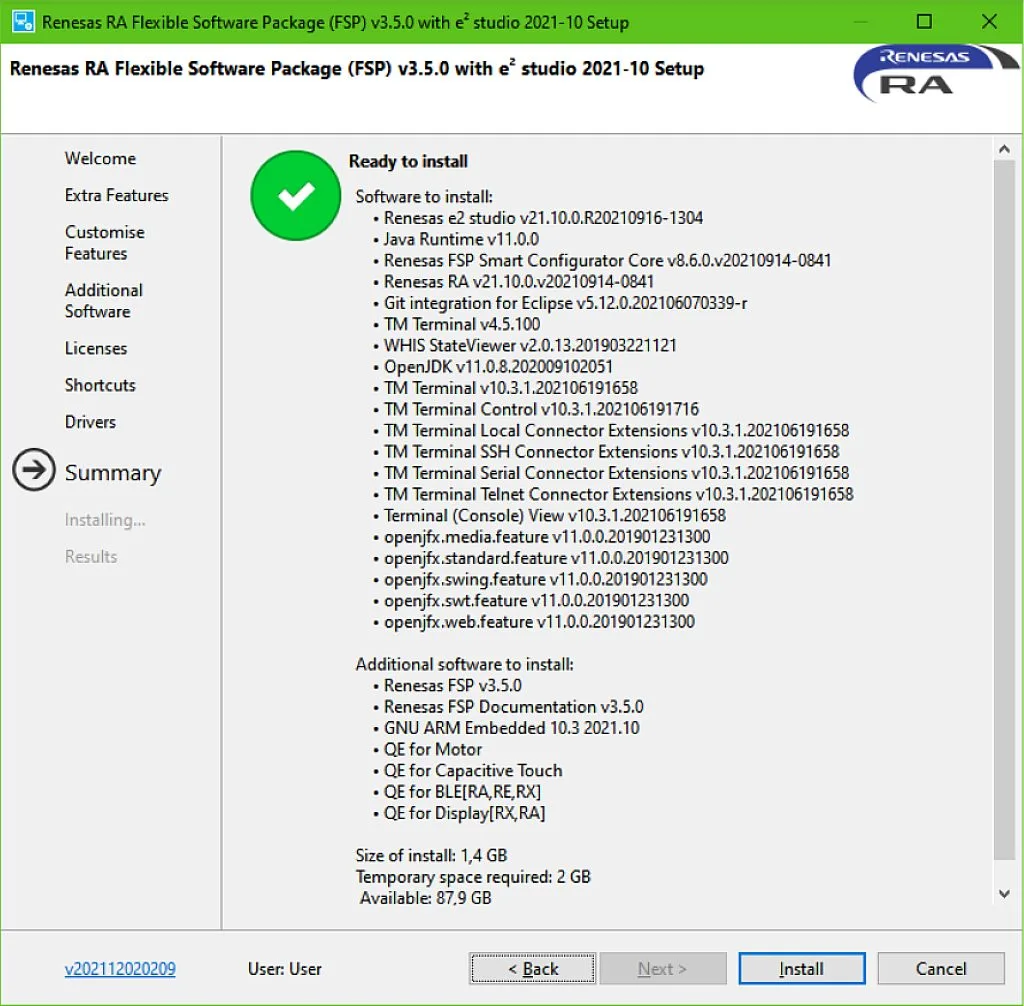
Here the installer shows us everything we’ve selected and the required space for the application. If you want to change anything, it’s your last chance to do this. If you’re ready to proceed, click “Install” and wait while the installation process finishes. During the installation it will ask for confirmation if you really want to install the drivers, you should agree.
After installation is complete, it will show you the summary information (Fig. 10)
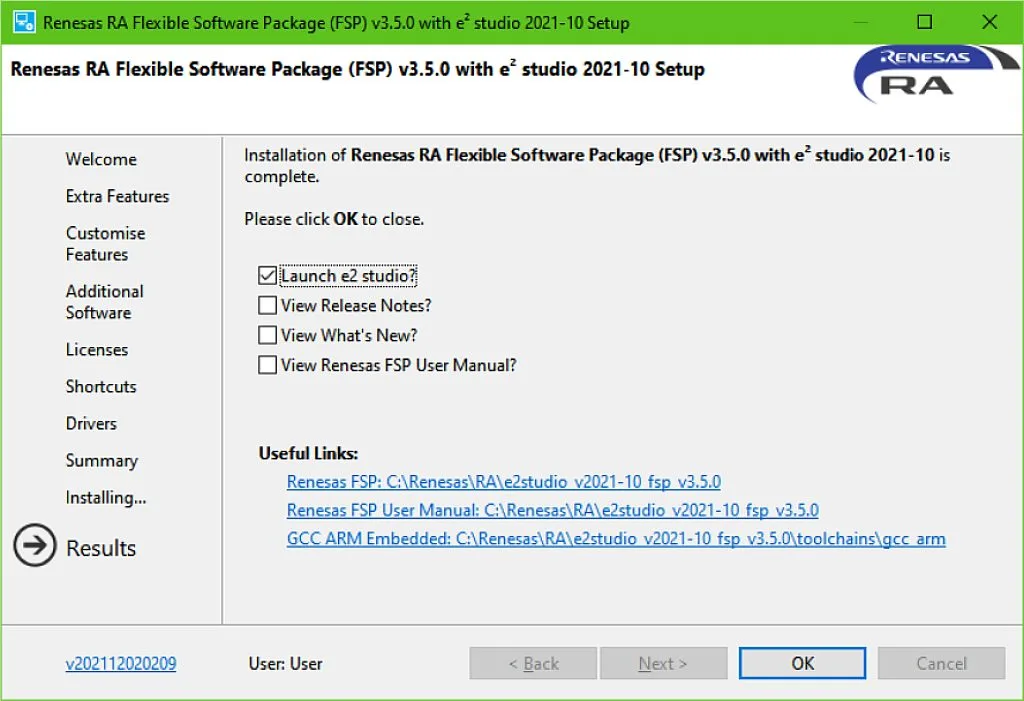
I have selected only “Launch e2 studio?” checkbox to run the IDE after closing this window. But it’s up to you what to choose. Also below are useful links, we will probably need them later. When we do everything required here, we can click “OK”.
So our installation is complete now, and the next part of the tutorial will be devoted to working with the e2 studio IDE. This IDE is based on the Eclipse so if you ever worked with any of Eclipse-based IDEs, it will be easy for you to deal with the e2studio as well.
The first thing after launching the IDE is selection of the Workspace. This is the path to the folder where your programs will be stored. You can leave the suggested path or select your own (Fig. 11)
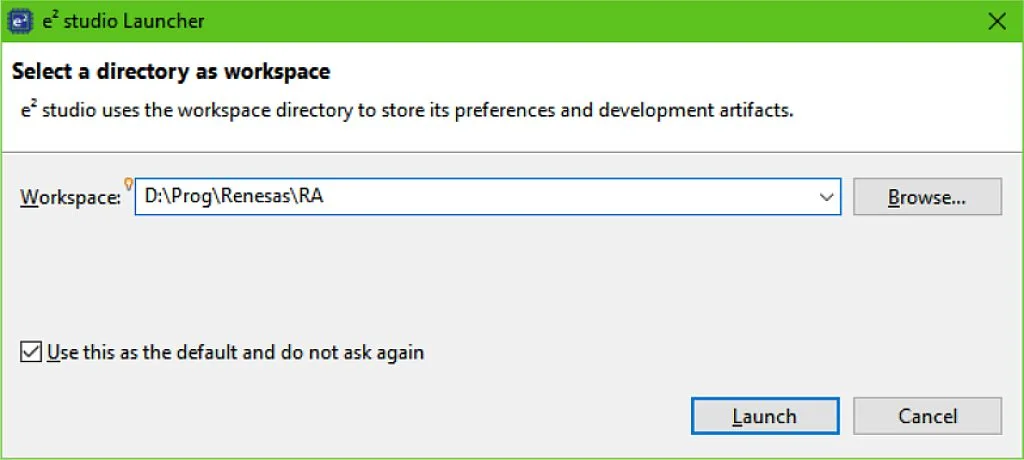
If you select the “Use this as the default and do not ask again” check, this window will no longer appear at startup. When you are done, click “Launch”.
Well, first of all the IDE asks if it can collect your data and send to Renesas (Fig. 12)
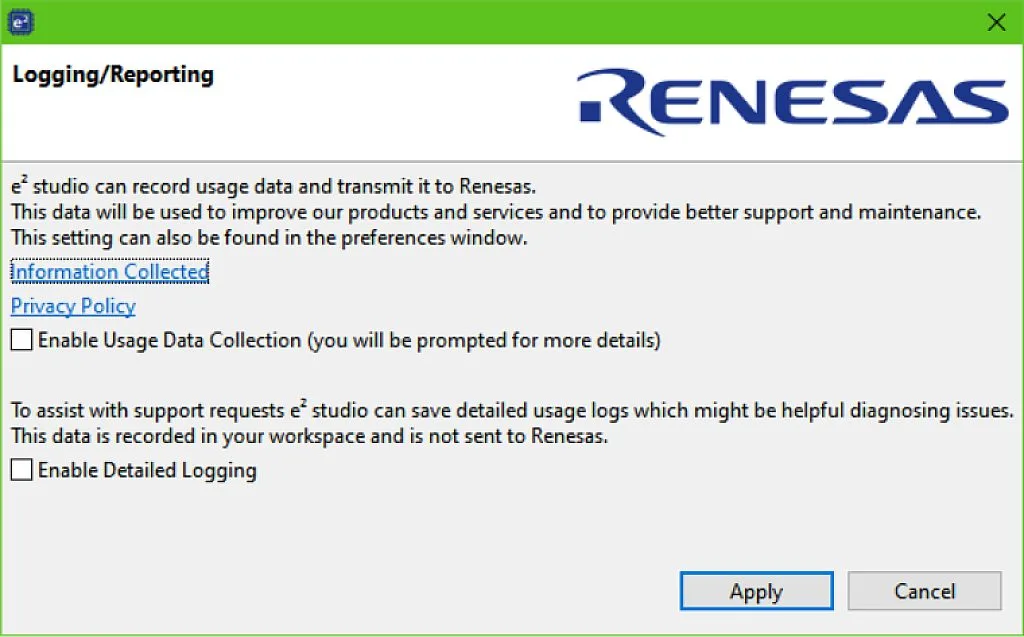
It’s up to you if you enable or disable this option. When you click “Apply”, you finally get to the IDE itself. First thing you see is the Welcome screen (fig. 13). It has the shortcuts to some useful resources, so you can leave it or hide the next time by selecting the corresponding option in the right bottom corner.
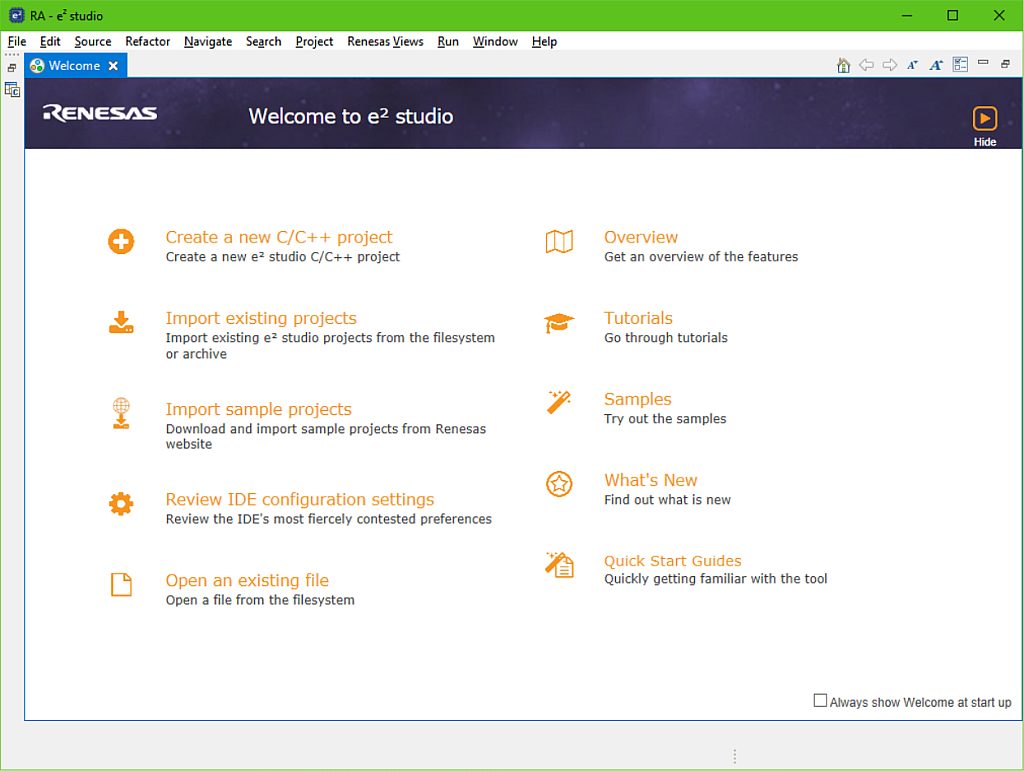
Let’s try to “Create a new C/C++ project”. When we click on it, we get the following prompt (Fig. 14)
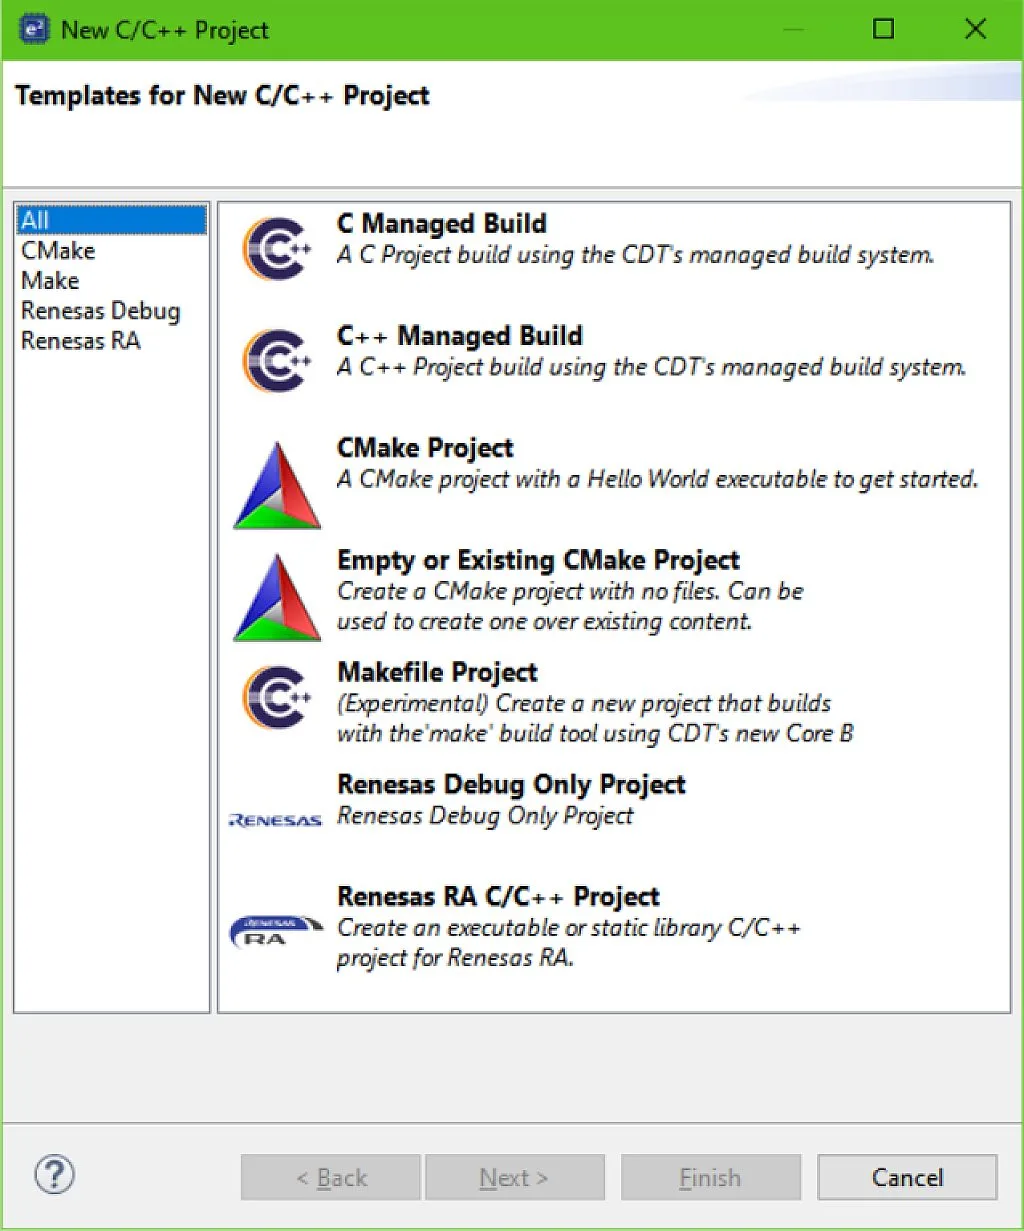
As we’re going to work with the RA MCUs, let’s select the last option “Renesas RA C/C++ Project” and click “Next” (Fig. 15).
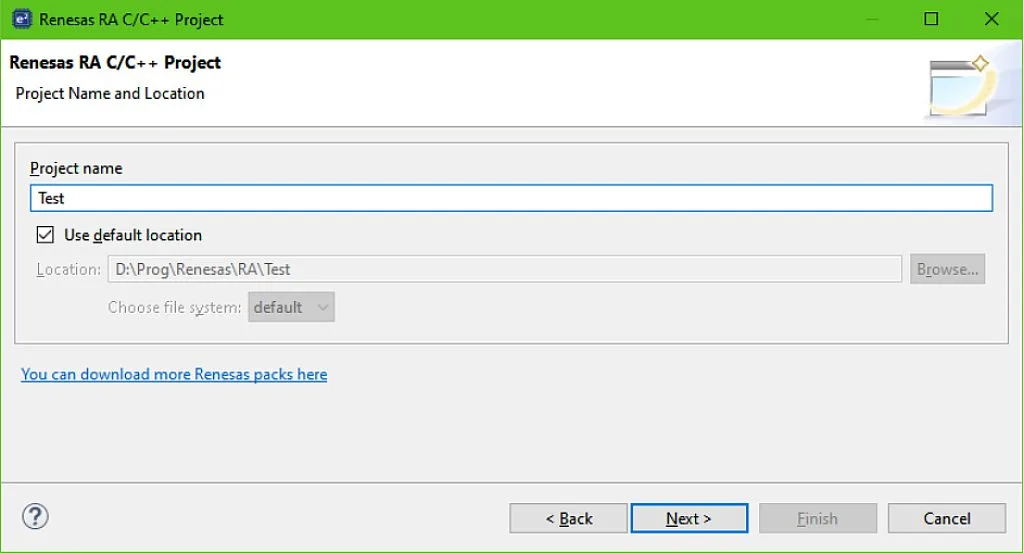
Here we should type the project name. I’ve selected “Test” because it’s really a test project, so the name is appropriate. Then click “Next” (Fig. 16).
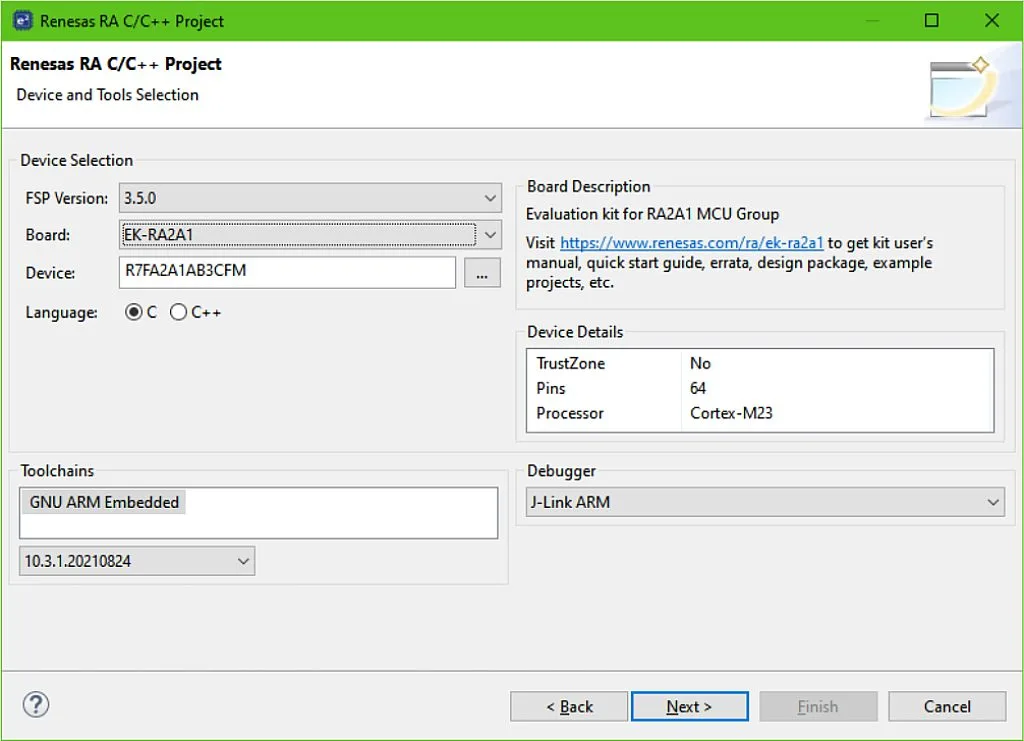
Well, here our paths may part because you can have a different MCU or development board than me. So I will select the tools and device I have, and you will do the same for your specific board.
In the “Device Selection” part we should select the “FSP version”. I have v.3.5.0, as you remember we installed this exact one. Then we can choose the “Board” from the drop-down list. If you use the custom board you can select “Custom User Board (Any Device)”. I have the EK-RA2A1 board, so I selected it. The “Device” field is filled automatically depending on your board. If you have a custom board, you need to select it manually. The “Language” allows you to select C or C++ language for your application. I think, for the first time, C will be quite enough.
In the “Toolchains” part we can select the toolchain for compiling and linking our application. For now only one option is available - the one which was installed with the IDE. It’s GNU ARM Embedded.
In the “Board description” part you can see a brief description of the selected board and the link to the Renesas site where you can get more information about it.
In the “Debugger” part you can select the used debugger. As I mentioned in the previous tutorial, all Renesas development boards come with the built-in J-Link debugger, so we can leave the default option.
Now we can click “Next” and see the following window (Fig. 17). This window is shown only for the Cortex-M33 core.
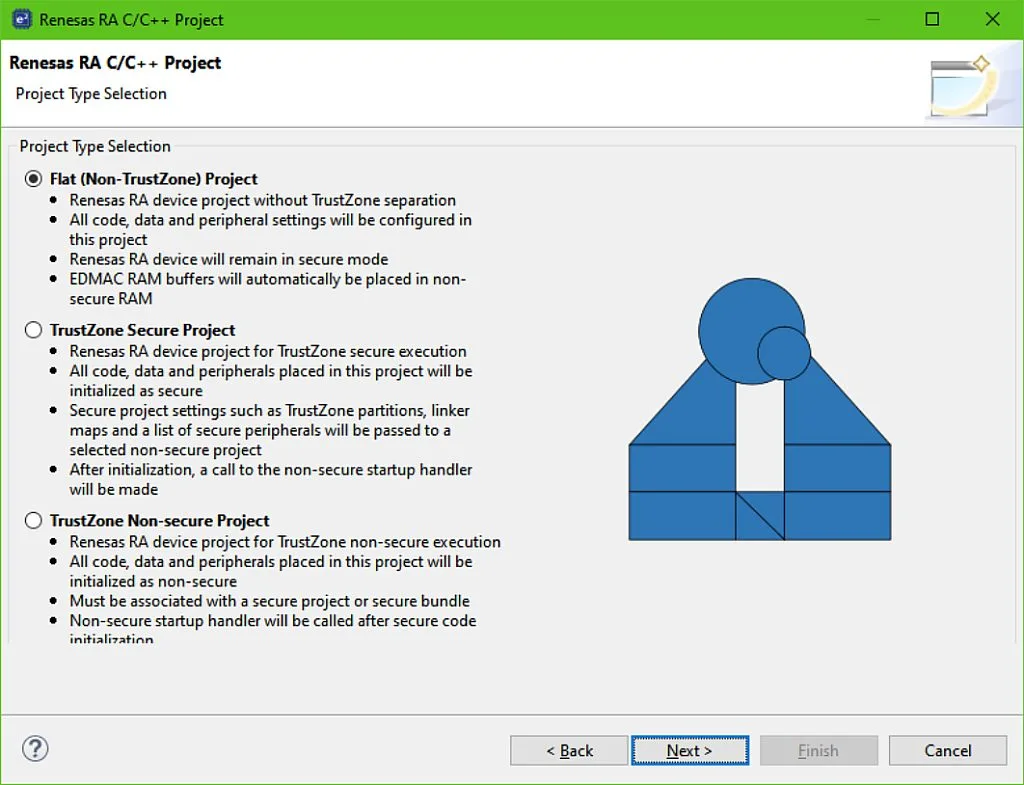
Here one can select the project type. If the MCU used has the Cortex-M33 core, which supports the TrustZone feature, we can select whether or not we’re going to use it. For now let’s skip this and select the first option “Flat (Non-TrustZone project)”. And click “Next” (Fig. 18)
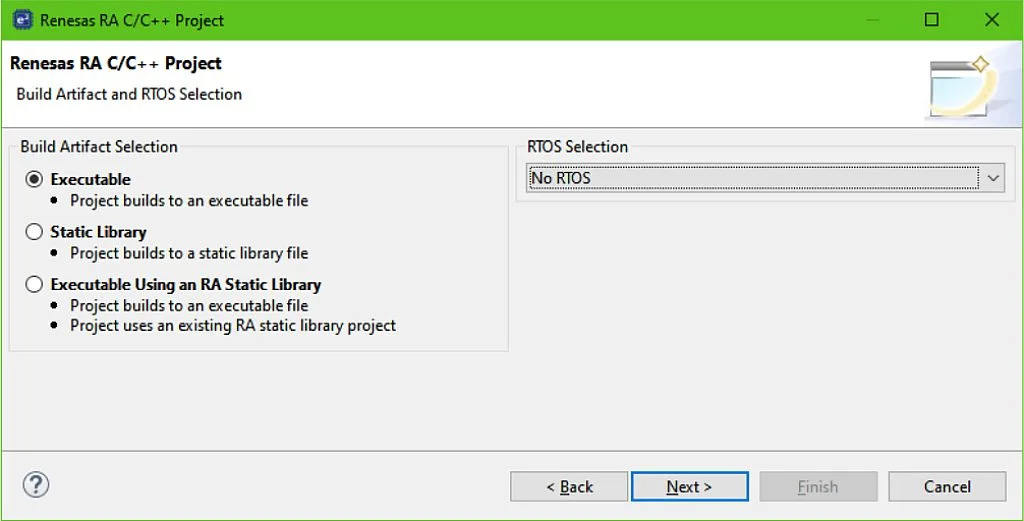
Here we need to select the build artifact. We’re not going to create the Static library or to use the existing one in the first project, so we select the first option “Executable”. In the right part of the window we can add an RTOS to our project. We will do it in some of the later tutorials but for now we will not use any, so we select “No RTOS”. It's actually interesting that even two different RTOS are available for RA MCUs: “Azure RTOS ThreadX” and “FreeRTOS”. When we click “Next” we will see the following window (Fig. 19)
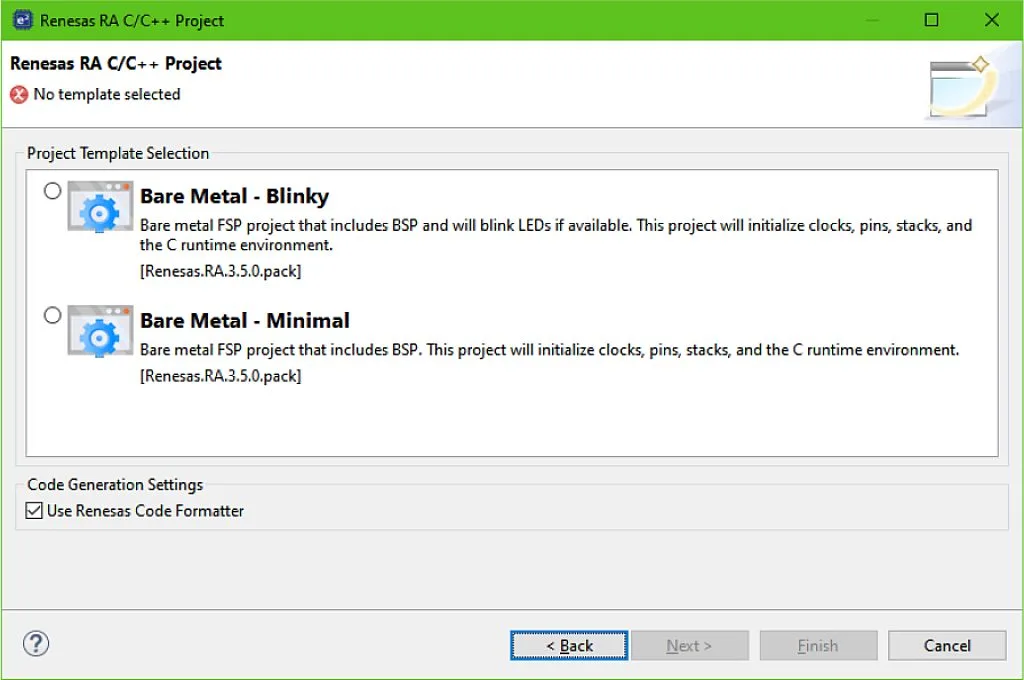
I think it's a good idea to use the “Bare Metal - Blinky” option for the first project to see what code will be created by the IDE by default and to see how easy the LED blinking is implemented with the RA MCUs. So we select the first template and click “Finish”. Our project is finally created and set up. But the IDE requires more actions from us, and asks if we want to open the FSP Configuration Perspective (Fig. 20)

Let’s allow it to do this. Anyway we can change the perspective at any moment. Finally we get to the IDE itself (Fig. 21).
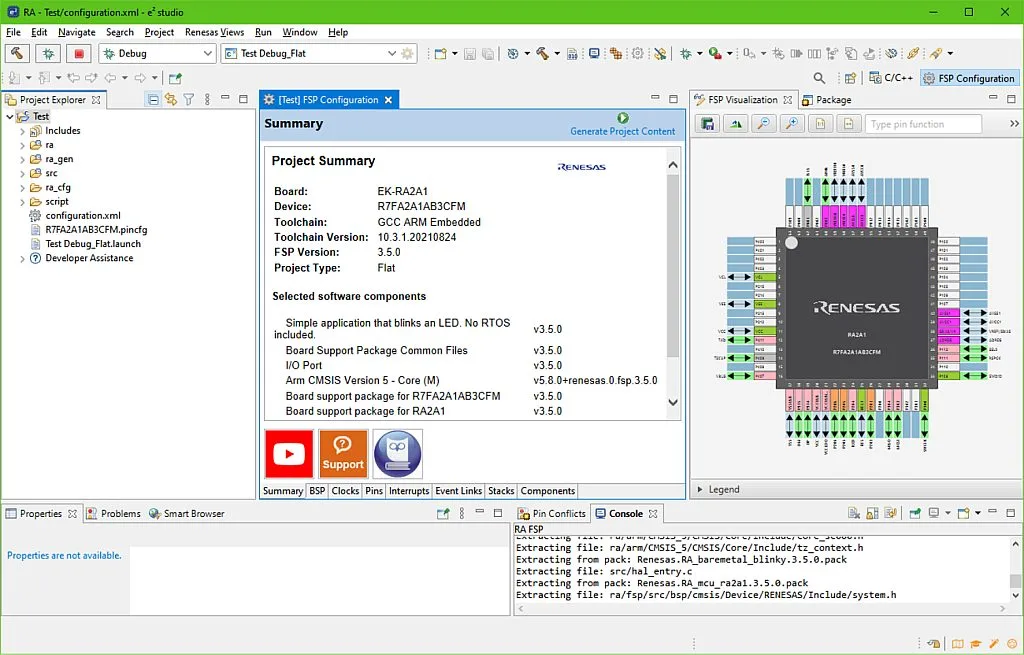
If you ever have worked with the Eclipse-based IDE, everything will look familiar to you. As you can see, in the FSP configuration perspective the IDE window is divided into three parts. The Project Explorer is on the left. It’s the common part for all perspectives, and it shows which projects are located in the workspace, and which files are included in which project. In the center there is FSP configuration. We will talk about it later, and for now let’s just acknowledge its existence. In the right part you can see the visualization of the MCU, which pins are already configured correctly for the development board in which it’s installed. Let’s also skip it for now.
Let’s try to build the program to check if the automatically created code works well. To do this we can select the “Project” - “Build All” at the main menu or click at the hammer icon. When we do this, the compilation and linking process starts, after which you get the text “XX:XX:XX Build Finished. 0 errors, 0 warnings. (took Xs.XXXms)”.
Let’s now see the code of the LED blinking. You can find it in the “src” folder, a file named “hal_entry.c” (Fig. 22)

Well, the code by no means seems straightforward. And there is a question: why is it written in the “hal_entry.c” file and not in the “main.c”? I think explaining these things will take a lot of time, and I also need to tell first about the FSP and how exactly it works and interacts with the hardware and the user code, so we will get into that later.
If you don’t have the patience and want to start programming right now, you can find the answers in the aforementioned RA Family Beginner's Guide. Otherwise you can wait for the next tutorials where I’ll fulfill your curiosity and explain everything.
As homework, you can find and install the e2 studio with the FSP on your PC and create the Blinky project, so there will be something we’ll have to work on next time.

Get the latest tools and tutorials, fresh from the toaster.

