LTspice - Getting Started in 8 Minutes
Published
Please accept cookies to access this content.

TRANSCRIPT
We have started to learn more about basic circuits here on CircuitBread and as part of that, I think that it’s really important to know how to use LTspice, which is a simulator — a way that you can put your circuits in and double check your answers because sometimes we make math mistakes, we make other mistakes, and if you have your circuit simulation, and you have your math and they match, that's a good thing. It makes you feel a lot better about yourself.
So I'm only going to get into the very basics of LTspice. I'm going to show basically how to do a DC analysis with some resistors. We're gonna go over a little bit but very very high level. I basically want to get it so the first time you open this program, you say, Oh, that's how I do it. But any sort of complications, we'll worry about that later. So with that, let's jump right in.

Okay, so let's first things first, open up LTspice, and we want to open a new blank schematic. And so when you open this, you think, man, what... what is this? There's nothing here and in fact, LTspice is an incredibly powerful tool. It has a bunch of stuff, but it can also be very very simple.
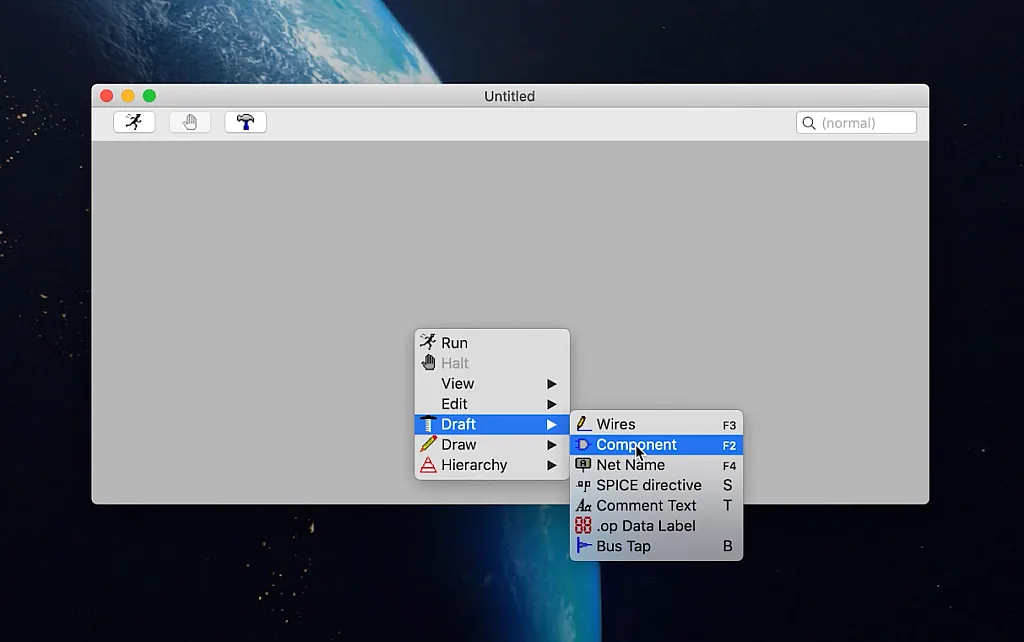
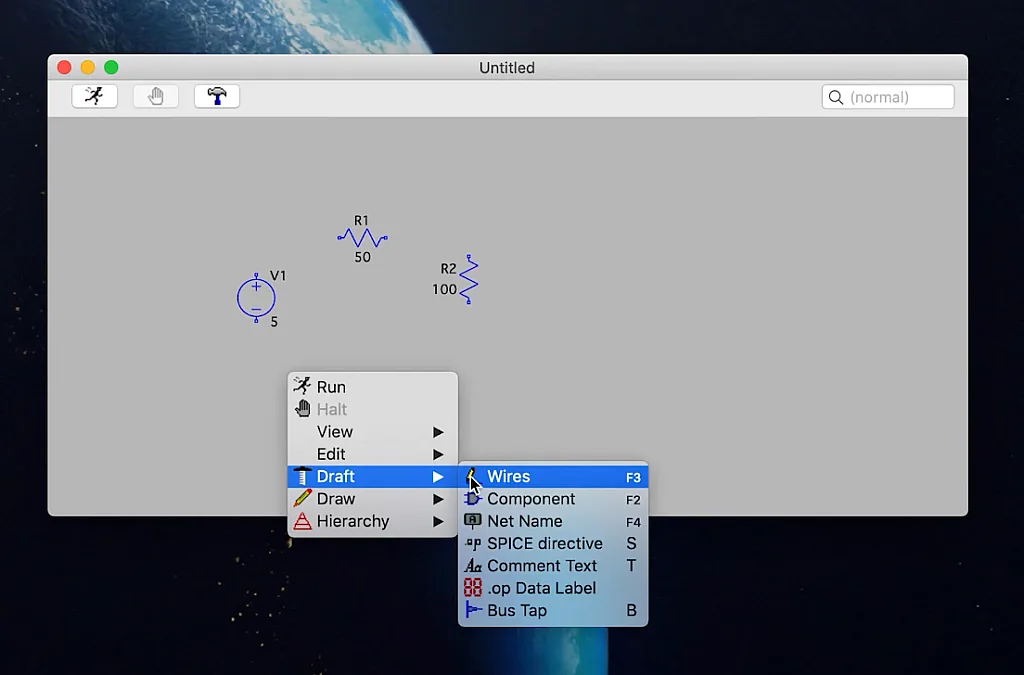
So first things first, let's build a circuit. So you may think, what?, there's nothing here, what am I supposed to do? The key is in the right click. So you right click anywhere, and it comes up with a bunch of different options. And we are going to want to go down to Draft and go to Component. So let's create a very simple circuit and we will just create something with a voltage and voltage source and some resistors.
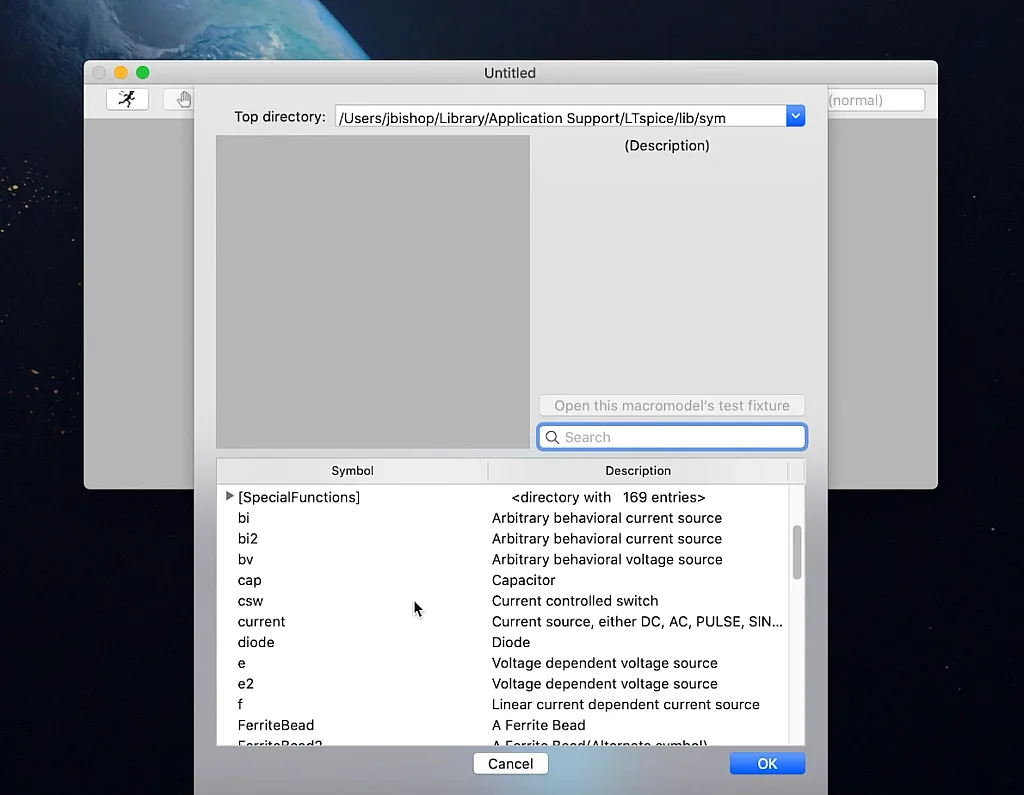
So as you look here, there, this may seem like a lot, but actually, there are some things that you can completely ignore for right now at least. And honestly, it also has a lot of good things. We see a capacitor here, a diode here, voltage dependent voltage source, all of those things in here, inductors. And you may say, Okay, why are there multiple NPNs, things like that. Some of them are just the way they look. For example, resistor, which I'm going to get, I like the look of this resistor more than I like the look of that resistor. And other than that, on this level, that's all there is.

So let's choose this resistor. Go up and I'm used to right clicking to rotate things, and that's not the correct thing. And you can see up here where it says type Ctrl-R to rotate, Ctrl-E to mirror. So let's do Ctrl-R, just make a resistor, and another resistor just like that, setting up a very basic circuit. And then you can either right click or hit Escape to get out. And then you go back and do the same thing.
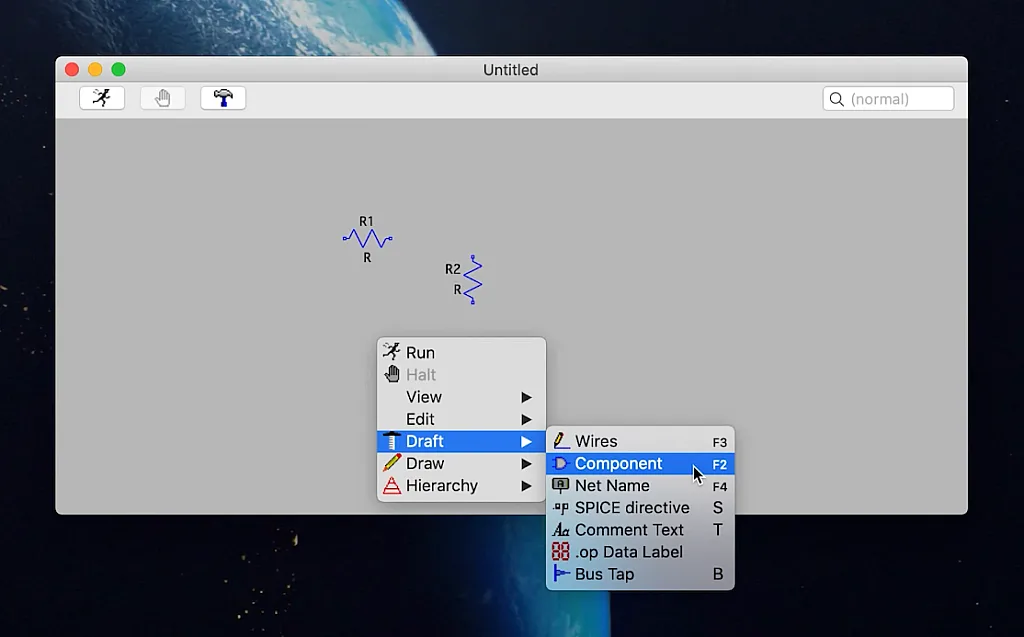
Now, if you notice over here, it says F3 for wire, F2 for components, F4 for net name, there's a lot of these keyboard shortcuts that you can use, but I'm not going to use right now. So just be aware that even if it's not obvious, there's usually a lot of things giving you hints as you're doing this.

So let's go down and get a voltage source. And notice that it says it can be DC, AC, PULSE, SINE... I'm actually not sure, PWL, exponential, SFFM. Okay, you can do a lot of different things. But again, we're just going to worry about DC right now.

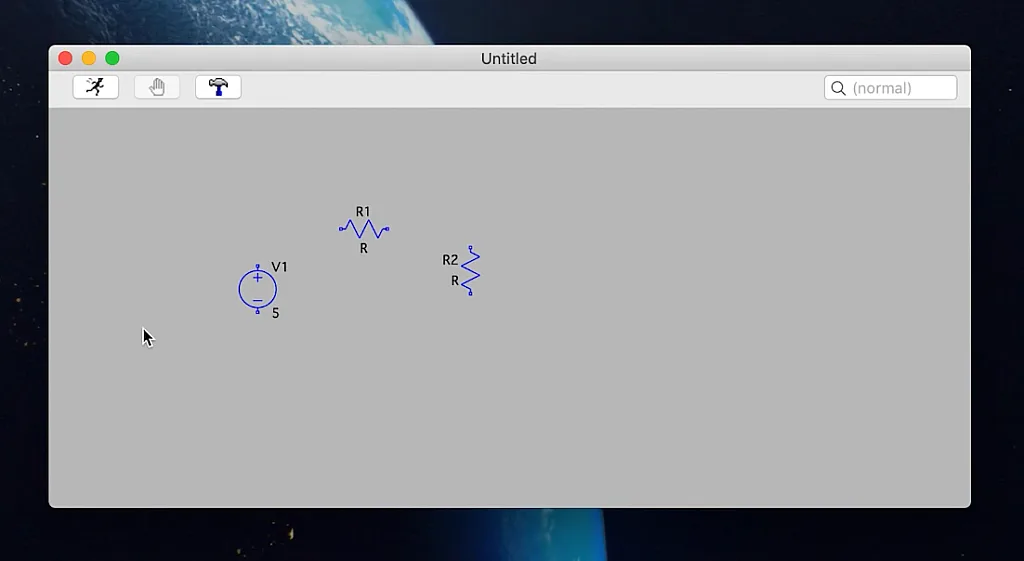
So we're gonna place that right there, escape out, and now as you see up at the top where that just disappeared, says right click to edit V1. So here, we want to put a DC value and let's just put five volts. And since this is going to be an ideal voltage source, we're going to ignore the series resistance. But of course, any real voltage source is going to have a series resistance. But for what we're doing right now, it's not a big deal. So let's do that.
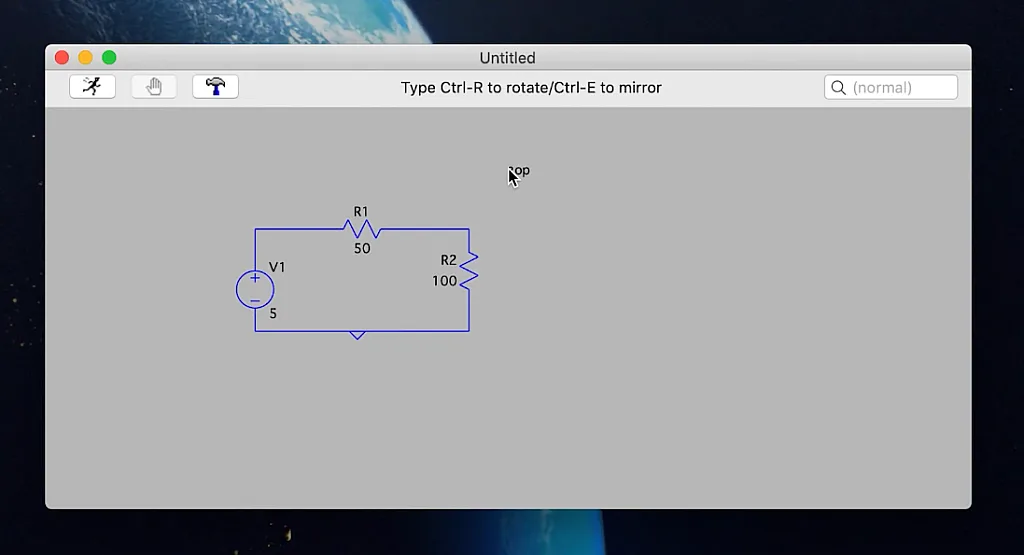
Now we've got our five volts right there, then go up here, right click, let's just say this one is 50 ohms, and you can also pick a standard percent value, which is you know, your 1%, 5%, 10% whatever, which we're not going to worry about here again, because we're assuming everything is perfect, and then let's just say this is a 100 ohms. All right, now we're gonna want to actually connect all of these with a wire.
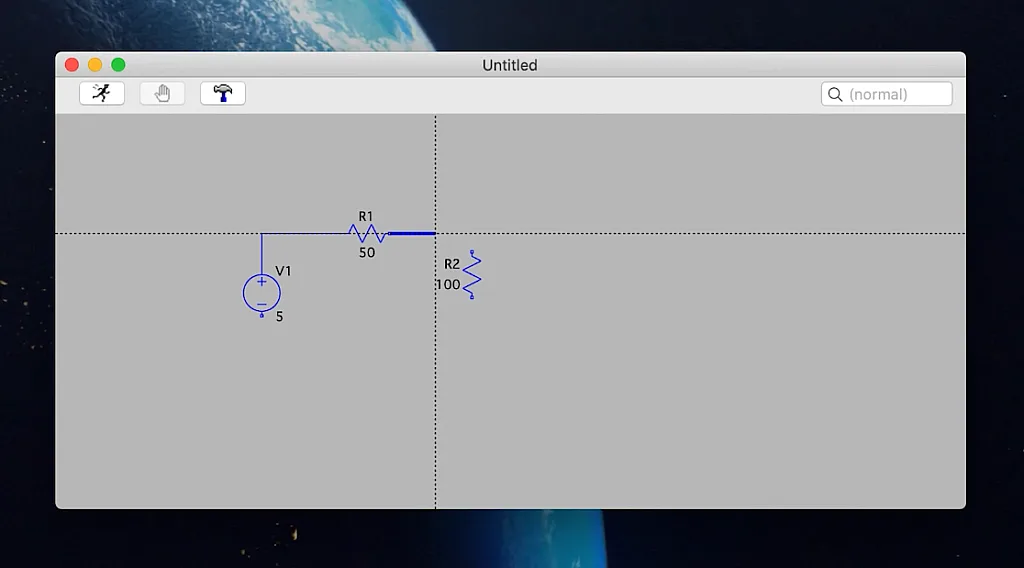
So let's go to the wires and connect everything together. And it doesn't have to be pretty but you definitely need to make sure those nodes are actually connected. Now this is the one thing, and maybe, I don't, I don't know why I missed it, but the first time I opened LTspice in a while I could not find the ground symbol anywhere, and I couldn't find any shortcuts. So just know that to make a ground symbol, you hit the letter G on your keyboard, and voila, there you go.
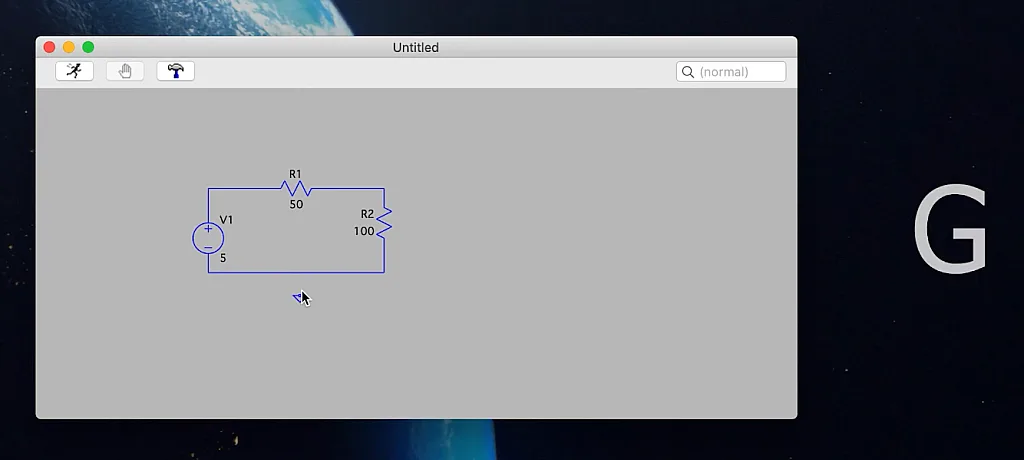
And you can just plop it on there. That's kind of ugly. Normally, I'd like to put a line down there. But that's purely aesthetics. Right now we have defined this as the ground spot. If you don't put that on, when you try and run the simulation, it's going to say, hey, you're missing a ground, and then you're going to have to put in the ground. So it's not going to be the end of the world.

So now we have this. So now what do we do with this? How do we find anything out? Now you actually, and this is where things can get complicated, you need to go and you need to put in a spice directive. Now for us, for this DC analysis, all you need to do is .op and just pop that wherever you want. And if you try and run the simulation without that .op, it's going to give you a complaint about that or a complaint about this.

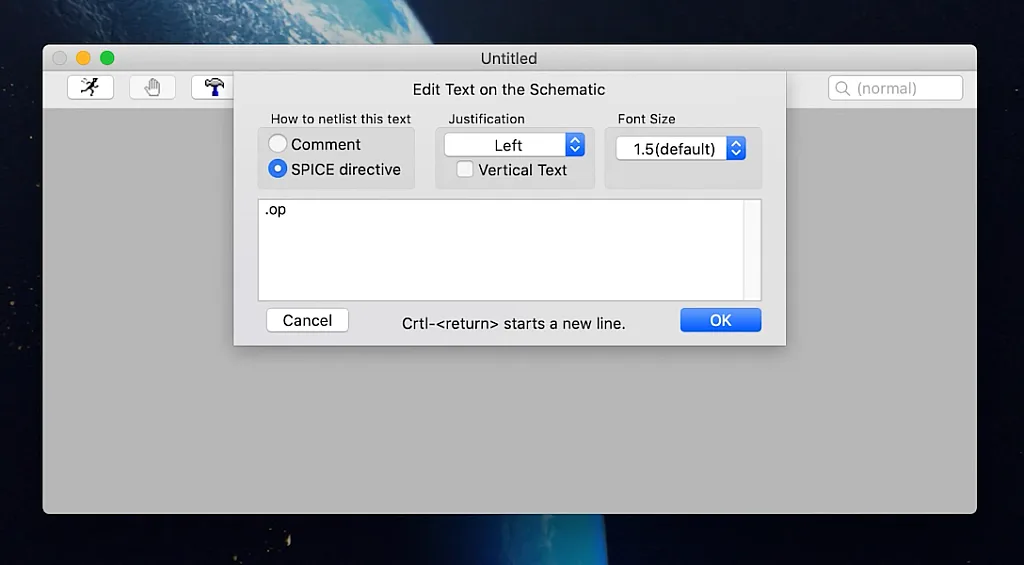
So there's a lot of internal corrections here. So you can't really screw it up too much but there is confusion because it'll say, hey, you forgot this. And if you've never dealt with it before, you just think, " What? Forgot what? How am I supposed to fix that. So basically, this is all you need for this to actually work.
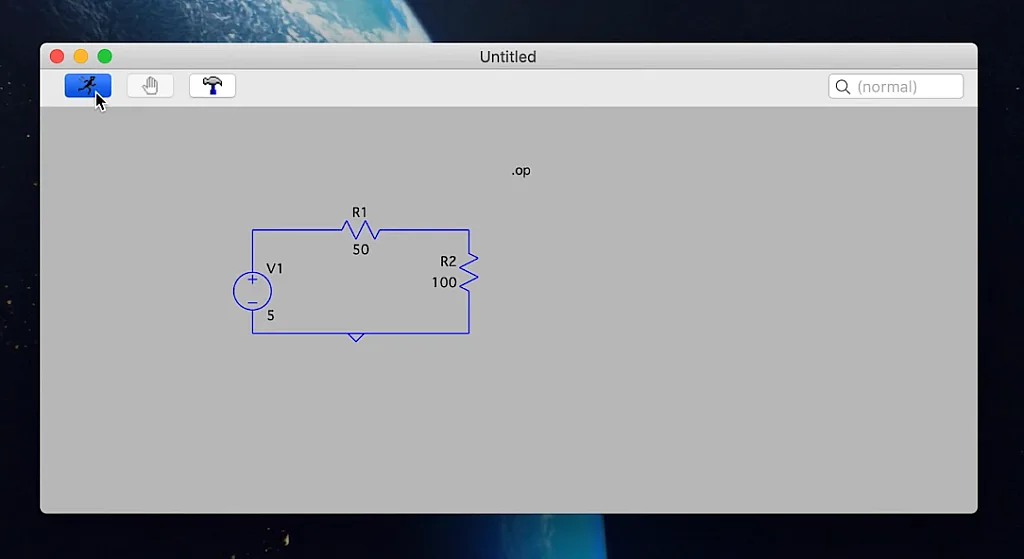
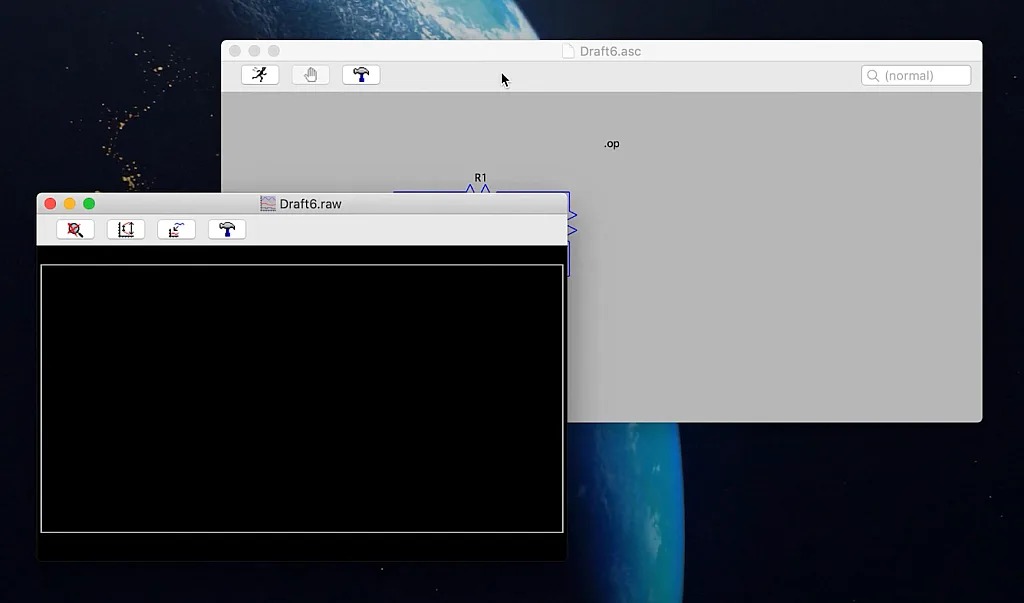
So let's go to run, it pops up this empty black box. Well that is fantastic. Well now what we can do is we go over here and we notice we have different things when we go over our put our mouse over things. So if you look very closely, that looks like basically an ohmmeter, one of those things where you put your device around a wire, and then it measures the current through it.
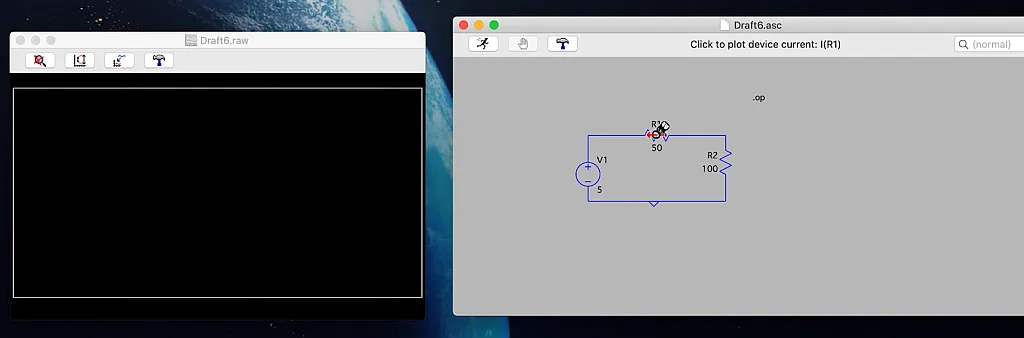
So if I click right here, it is going to measure the current through R1 in the direction from right to left. Now since we have the voltage source on the left, we anticipate this is going to be a negative number. And yes, it is, right there.
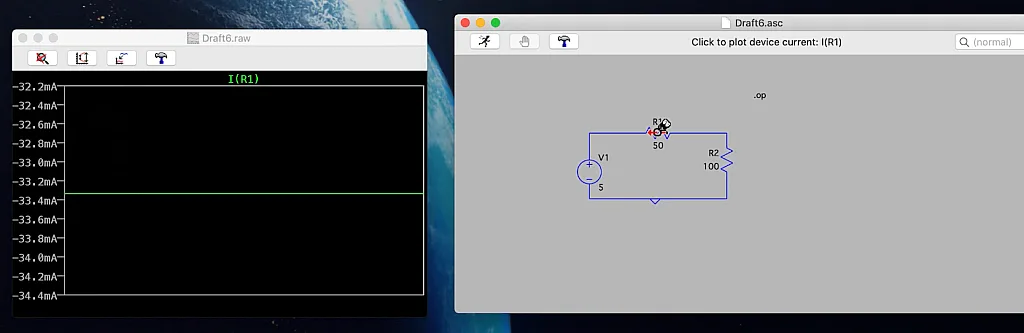
So now as we clicked on that, it popped up over here and it gave us our negative 33.3 milliamps. And then if we want to see what our current is, and it's going in the same direction, so it will also be negative here on R2. Oh, there we go. And now I am going blind. Oh, yes, the problem is, is that the R2 is now going over the R1. And so you can't see the green of the R1. But it is still definitely there. Because as we know, since these are in series, they are going to have the same current through them.
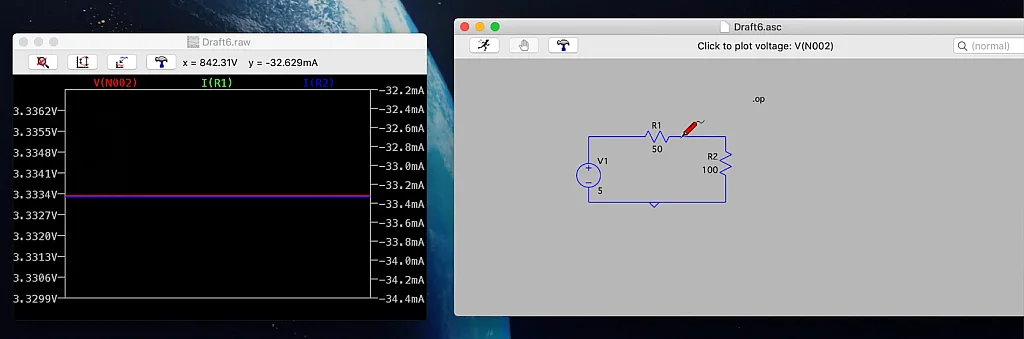
Now, you notice here that looks kind of like one of those voltage meter things. And so you can click here to find the voltage at this node, and then that pops up and tells you that red, which becomes a nice little pink right there is 3.3334 volts.
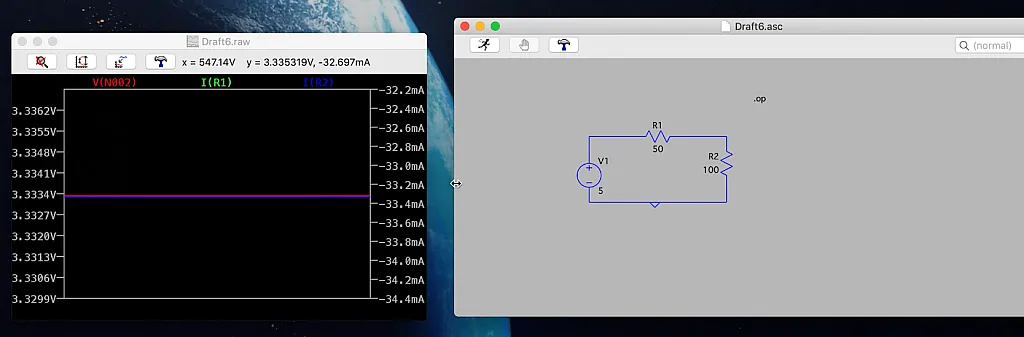
And that's it. So you want to look here, you're gonna have a... you can find the voltage across all of these things. And you can just basically click on things to see what you expect. Now, again, if we can even find the current through the voltage source, but we know it's going to be the same.
So this is basically it. That's all you need to do to find out how to find the voltage across a resistor to find the current through the resistor and how to set up a very simple DC circuit. So from here, if you're doing any of your basic KCL, or KVL analysis, using only resistors, this is all you need. You just need to put more of them and put them in the way that you need to for your problem. And later, as you get things are more complicated, you can start putting in capacitors and inductors. And you can start doing the AC analysis but to go from, "I have no idea how to use this program" to "Oh, okay, now I can use it to get at least some information out of it to compare the answers that I'm doing with my calculations." That's it. So I hope that was helpful. I hope that was simple, quick and fast and easy and all that. If you did like it, give this tutorial a like, subscribe to our channel, and we will catch you in the next one.

Authored By
Josh Bishop
Interested in embedded systems, hiking, cooking, and reading, Josh got his bachelor's degree in Electrical Engineering from Boise State University. After a few years as a CEC Officer (Seabee) in the US Navy, Josh separated and eventually started working on CircuitBread with a bunch of awesome people. Josh currently lives in southern Idaho with his wife and four kids.

Related Tutorials
")
Related EE FAQs

What software is essential for electrical engineering students?

Answered by Josh Bishop
Explore CircuitBread
- 246 Tutorials
- 9 Textbooks
- 14 Study Guides
- 31 Tools
- 108 EE FAQs
- 295 Equations Library
- 219 Reference Materials
- 97 Glossary of Terms
Friends of CircuitBread
-

Free Educational Blog Content
-

Partner Store With Academic Discount Pricing
-

Free Electronics Lessons & Resources + 2 Perks


Get the latest tools and tutorials, fresh from the toaster.


