How does an LED work?
Published
Have you ever asked yourself how this small electronic device, an LED, emits light? Compared to the much less efficient incandescent light bulb, which produces light by converting electrical energy into heat energy, LEDs directly convert electrical energy into light energy. Over the last few years, LED usage has increased exponentially. This is because LEDs are efficient, easily dimmable, non-toxic, and are much more durable compared to other light sources. But what is an LED and how does it actually work? In this tutorial, we are going to answer these questions.
What is an LED?
An LED or Light Emitting Diode is basically a type of diode that is specifically designed to emit light. It operates the same way a general-purpose or a rectifier diode operates. But what makes it emit light is the semiconductor material used in it. The construction of an LED is just the same as a normal pn junction diode. However, instead of silicon or germanium, LEDs are made from compound semiconductor materials like gallium arsenide, gallium phosphide and other semiconductor materials that emit light. Silicon is most widely used in normal diodes because it is less sensitive to temperature. However, it doesn’t release energy in the form of light but releases energy in the form of heat, so they are not used in LEDs.
How does an LED work?
So, an LED is a diode, therefore, just like a regular diode, it can be forward biased or reverse biased. However, an LED only emits light when it is in the forward bias condition. So for now, let’s just focus on forward biasing an LED. To forward bias an LED, basically you just connect its cathode terminal to the negative side of an external bias voltage and its anode terminal to the positive side of the external bias voltage.

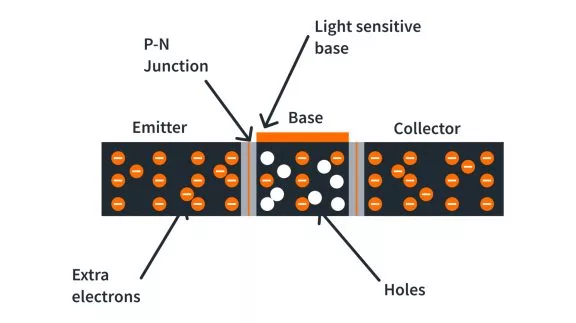
When an LED is forward biased, the free electrons from the n region gain enough energy to cross the junction and recombine with the holes in the p region. Initially, free electrons from the n region are in the conduction band but as they cross over into the p region, they release energy and fall into a hole in the valence band. For a normal silicon diode, the energy released would be in the form of heat. But for the semiconductor materials used in LEDs, the energy released when free electrons recombine with holes is in the form of light.

From the point of view of an energy diagram, we can see that forward biasing an LED narrows the depletion region and allows free electrons to cross the junction. As free electrons cross the junction and recombine with holes, electrons release energy in the form of light.

So that’s it! Basically, what happens inside an LED when it is forward biased is just similar to a regular diode, except that electrons release light instead of heat when they change energy levels.
Reverse Bias
We don’t need to discuss reverse bias except to say it acts like a diode when reverse biased and if you exceed the established parameters, you will destroy the LED.
LED Color
One of the first LED characteristics that we consider when we use an LED is, of course, its color. Sometimes we use green LEDs to indicate that the circuit is in good condition or red LEDs to indicate that there’s a problem. LEDs can be red, orange, yellow, green, blue, white, or violet and what determines the color of an LED is the semiconductor material used in it.
Photons have different wavelengths based on their energy, or energy based on their wavelengths, depending on how you look at it. To achieve different colors, scientists and engineers have figured out how much energy an electron passing from one material to another needs to lose in order for it to emit the photon of the correct wavelength for the desired color. We’ve put together a quick table that shows the colors, their associated wavelengths, and the material currently used to generate that color. If you’d like more time to check this table out, it’s under the references at CircuitBread.com

LED Construction
Using a 5mm LED, you can see how this combination on a semiconductor level is actually implemented into something useful. If you try to look at what's inside a 5mm LED, you can see that the lead frame connected to the cathode terminal, also known as anvil, holds the semiconductor material. The reflective cup which is connected to the anvil actually holds the semiconductor material. The n region is placed at the bottom so it’s connected to the cathode terminal while the p region is at the top. Then there’s just a wire that connects it to post lead frame which is connected to the anode terminal. One reason for this design is that the majority of the light produced by an LED is from the area of the junction nearer to the p region. So this area is kept as close to the surface of the device as possible.

And that’s it! I hope this tutorial helps you understand how an LED works. If you have any questions, leave it in the comments below and if you’ve found this interesting or helpful, give it a like and subscribe to our newsletter or YouTube channel!
Tutorial FAQs
How are the holes in an LED replenished? It seems that they disappear when recombined with electrons, yet the LED does not seem to "run out" of holes.
This is an excellent question. In a true circuit, as electrons recombine with holes, new holes are constantly being created due to the energy input into the system. These holes gradually move into position, replenishing the ones that have been filled. This continuous process ensures that there is never a depletion of holes in the LED.
In the discussion, it was mentioned that in a silicon diode, energy is released as heat, whereas, in LED materials, energy is released as light. Why is there a difference in the form of energy release between the two?
The difference lies in the wavelength of the energy and the magnitude of the energy drop when an electron transitions between energy levels. This principle is used to create LEDs of various colors. For instance, blue light, which has higher energy, requires a greater energy drop than red light. Therefore, materials are selected to achieve the necessary energy level change. In a typical diode, the energy drop is smaller, resulting in energy being emitted in the infrared range and thus being converted to heat rather than light.
How are knee voltage (forward voltage) and energy gap related?
The larger the energy gap, the higher the knee voltage. This correlation is observable in LEDs of different colors, as different band gaps produce different colors. Therefore, LEDs of various colors have different knee voltages (or forward voltages) due to their distinct band gaps.
Is there a material for LEDs that can produce all wavelengths, possibly by adjusting the voltage or another parameter?
As of current knowledge, there is no single material that can produce all wavelengths. The wavelength of emitted light is intrinsically tied to the materials used in the LED. Thus, different materials are required for LEDs emitting different wavelengths.

Get the latest tools and tutorials, fresh from the toaster.

